The cabinet is now officially, kind of complete...sort of. All major, heavy work requiring more than a drill has been completed, all artwork (except the control panel overlay) has been applied/installed, and all painting is done. The cabinet has been transported to my condo and awaits the CPO for the final touch. Here's what we accomplished this weekend:
- Attached thin pieces of black painted wood along the inside of the cabinet where the bezel and marquee rest to block light and secure the plexi.
- Attached top bracket to secure marquee.
- Did some touch-up painting on parts we nicked and scratched.
- Drilled hole for lock in back door and installed lock.
- Applied side art.
- Transported to my home.
Here's some play-by-play on the side art since it was a nerve-wracking process. First, the artwork from www.classicarcadegrafix.com was of good heavy quality, but the corners were square, not rounded as the original artwork is. So, using a pie pan as a guide, we took a razorblade to the corners and fixed that problem. Then...

To apply the side art, first we laid it carefully on its side.

According to the installation manual provided by Nintendo (can be found at www.klov.com), Mario Bros. side art is to be applied 2" from the top and 2" from the back of the cabinet. So, we made the measurement, placed something next to the ruler to hold its place...

And then used the half-sticky butcher's paper that painters use (I don't know what it's called) to give us a guide for where to place the side art.

Then, with mom and pop holding the bottom up high, I lined up one corner and slowly went across the width of the artwork with a cloth, making sure there were no bubbles. Just make sure it's lined up right before you start, because there's no turning back once it's down.

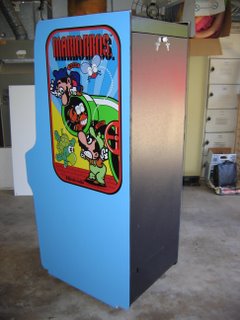
Let me tell you, the cabinet looks awesome...

A shot from the side...
Here's the back with the door in

Here's the bezel and marquee secured

A shot from underneath with the hidden freeplay buttons

 To apply the side art, first we laid it carefully on its side.
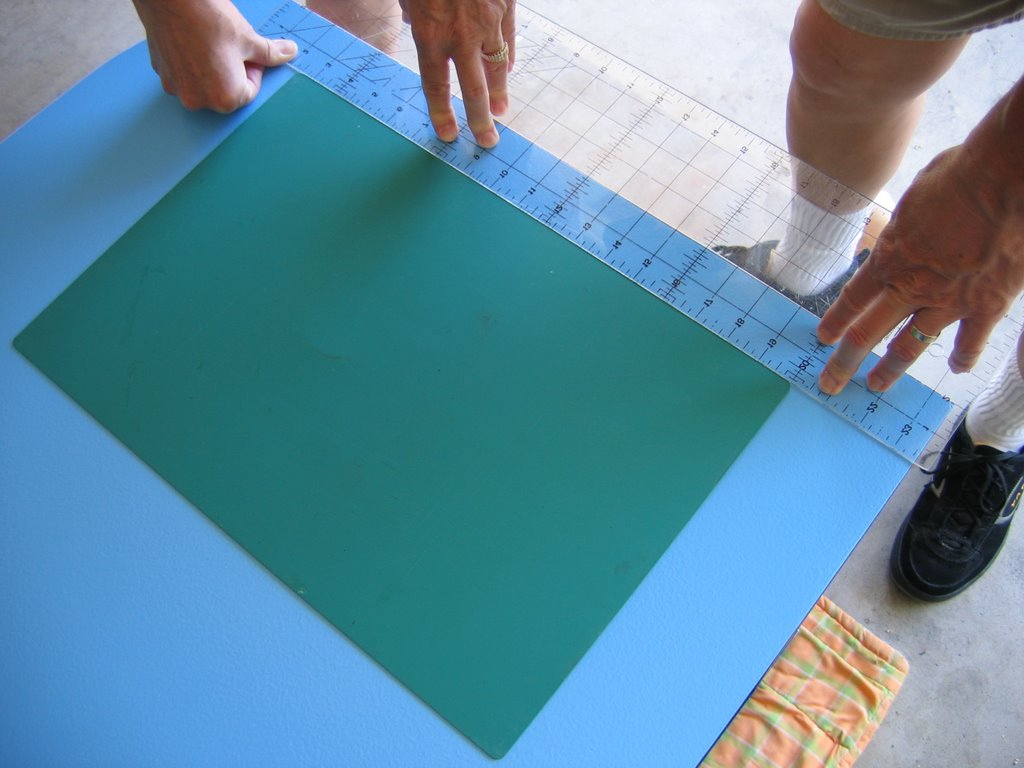 According to the installation manual provided by Nintendo (can be found at www.klov.com), Mario Bros. side art is to be applied 2" from the top and 2" from the back of the cabinet. So, we made the measurement, placed something next to the ruler to hold its place...
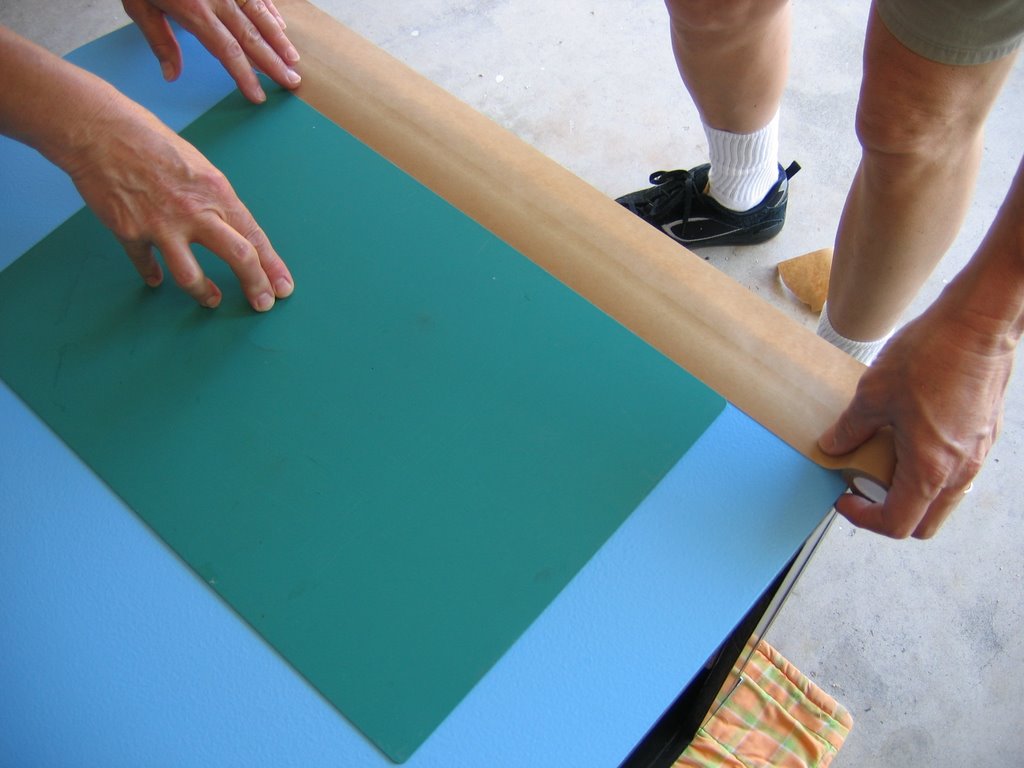 And then used the half-sticky butcher's paper that painters use (I don't know what it's called) to give us a guide for where to place the side art.
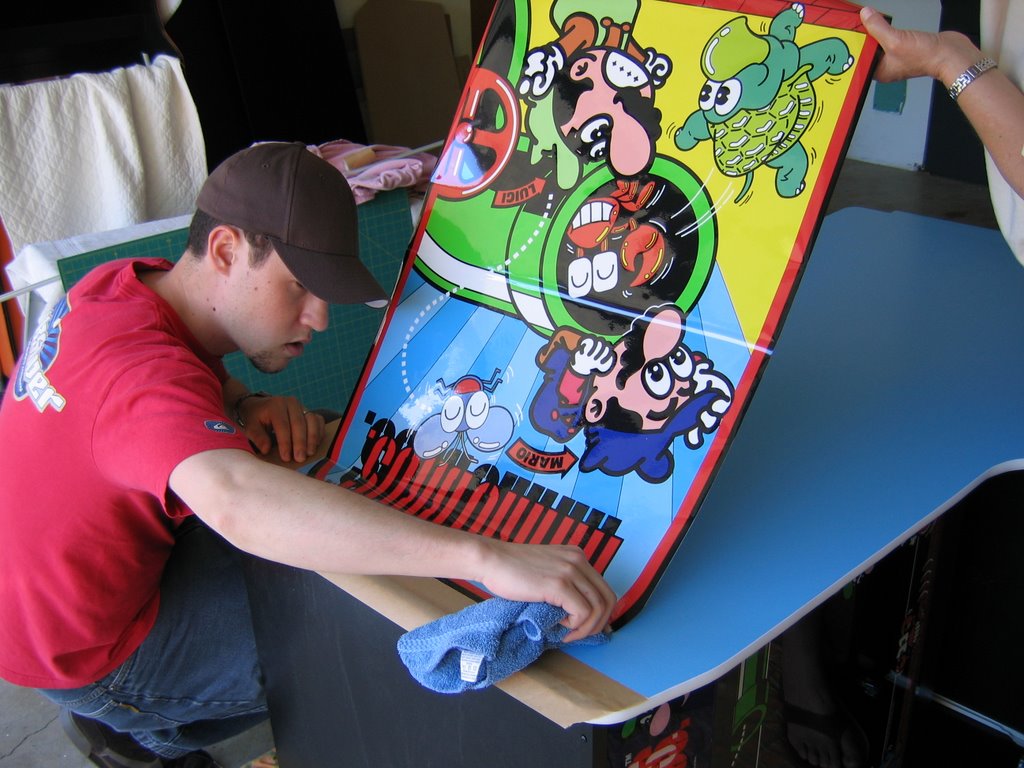 Then, with mom and pop holding the bottom up high, I lined up one corner and slowly went across the width of the artwork with a cloth, making sure there were no bubbles. Just make sure it's lined up right before you start, because there's no turning back once it's down.
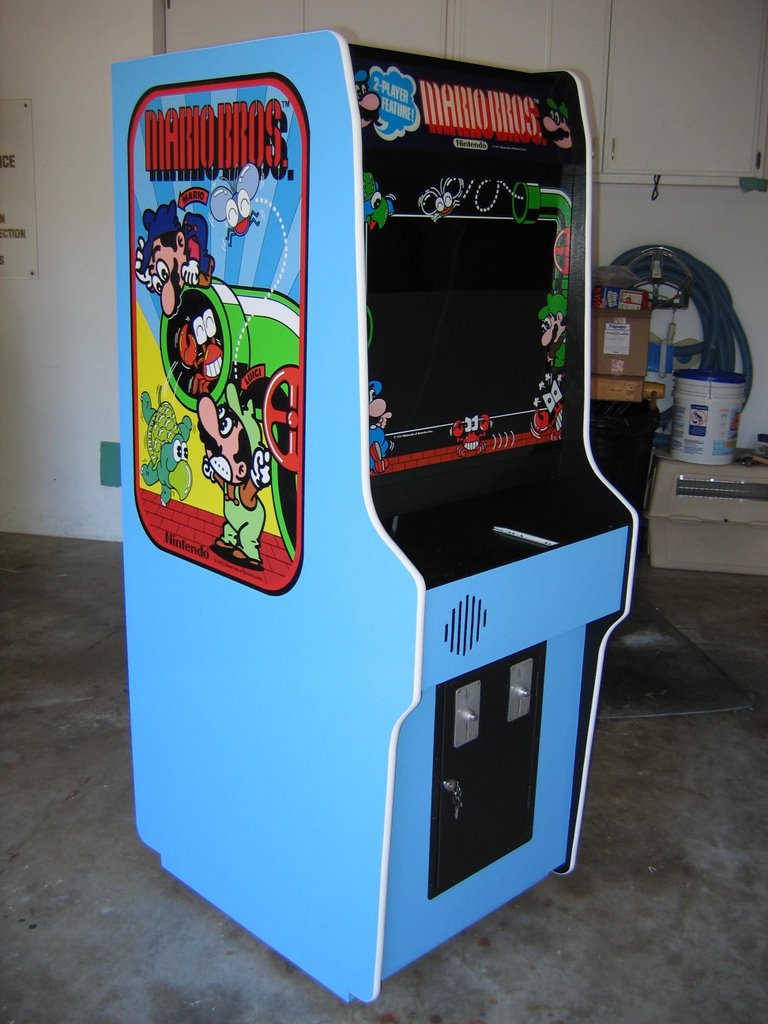 Let me tell you, the cabinet looks awesome...
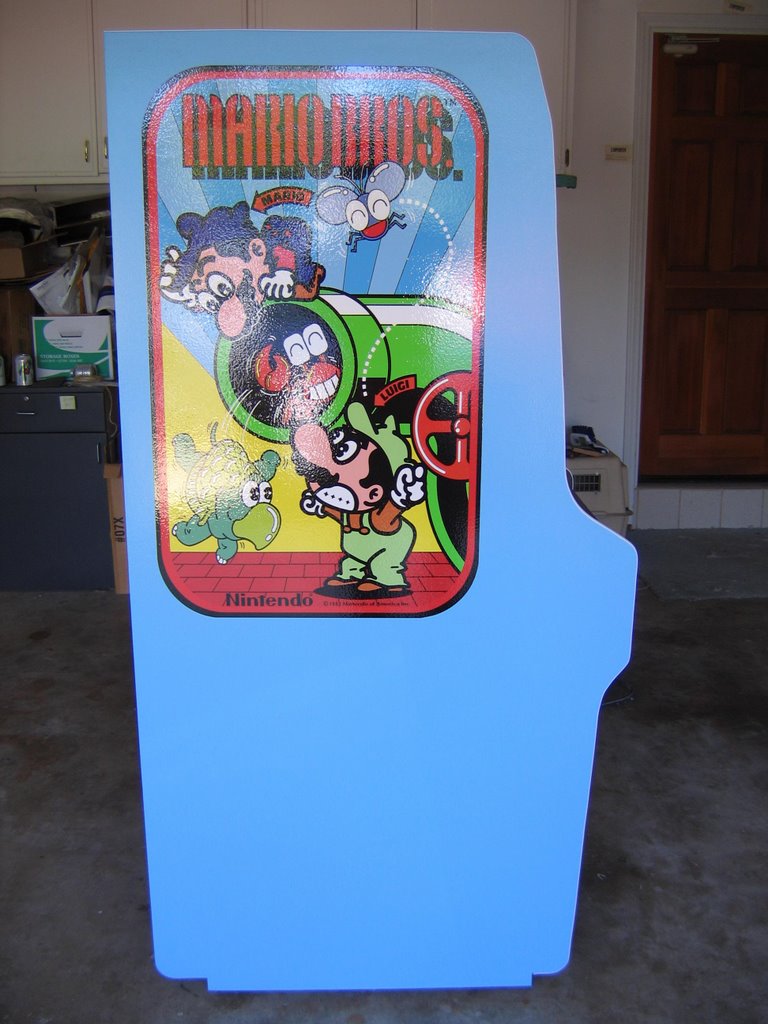 A shot from the side...
 Here's the back with the door in
 Here's the bezel and marquee secured
 A shot from underneath with the hidden freeplay buttons
5 comments:
Tim...Beautiful!
Wow, thats some great work. Good stuff!
awesome WoW !
This is awesome. I have Mario Bros. in my house. I always hated that ugly orange shade on the side, and it's a little scuffed up. I checked out the cabinet plans so that I could maybe construct one of my o wn, but the link was not working.
Cameron, I've got the plans if you need them, just email me. I know the jakobud site has been down for awhile.
Post a Comment