
This site will follow the creation of my MAME arcade cabinet. I want to give it the classic look of a Mario Bros game from 1983. Check back often for updates on my progress.
Tuesday, August 05, 2014
Resources
It seems that in the years since making my cabinet, many of you have wanted to duplicate the project. Since Google does a poor job of notifying me of comments here, and many of the resources I used are no longer on the web, I've collected some of the files I used into a zip file for your future use. In there are psd and ai files with images that can be used to create artwork (most notably the control panel overlay), as well as the original plans from jakobud.com (which seem to be intermittently available still here).
Anyway, if you find any of these files useful, I'd love to see how your project came together, so feel free to link pictures or blogs below!


Monday, January 26, 2009
POW Bar Stool Now Complimenting Arcade

Mom of the Year Award goes to my mom for making my dream a reality. A POW Block bar stool now welcomes guests to sit and play the Mario Bros. reproduction arcade cabinet. I found a couple old bar stools at a garage sale for $1. They were a bit rickety and had round seats, but my handy dad made a square seat and strengthened the stool with deep screws and some glue. My crafty mom took the pixel art POW Block I provided and got the black, white, blue, and light blue fabric needed and cut out the areas to pixel-perfection. After applying the pattern to the black fabric, she made a cushioned seat and wrapped it in plastic material so the POW would never come undone or get dirty. The best part is, sitting on the POW Block doesn't even use it up!
 A closeup of the POW
 One more shot of the new stool
Sunday, December 07, 2008
New Coin Mechs
The only eyesore on my Mario Bros. reproduction cabinet was the coin mechs on my original coin door. While we repainted to door itself, there wasn't anything I could do about the scratched, broken coin mechs on the door...until now. We found some brand new ones that fit perfectly from Pinball Resource (they are Asahi Seiko #730-A .882) for only $10 apiece! Take a look below for some before and after pictures.
 Can you guess which one is new?
Here are both new ones installed.
Friday, February 22, 2008
Price/Parts List
Some of you have asked for a price list, so here it is. I excluded a few expenses for things I didn't end up using as well as computer expenses (PC and monitor) since I already had that. This should at least give you an idea of what the cabinet itself might cost. Keep in mind that corners can be cut if you don't want authentic 1983 Mario Bros. parts (like the bezel, marquee, and coin door). Good luck!
| Description | Cost | Quantity | Total | With Tax |
| 5/8" MDF | $20.96 | 2 | $41.92 | $44.96 |
| 10-foot 2x8 | $7.10 | 2 | $14.20 | $15.23 |
| Jig Saw Blades | $2.56 | 1 | $2.56 | $2.75 |
| 2" Stationary Casters | $1.96 | 2 | $3.92 | $4.20 |
| 2" Swivel Casters | $3.47 | 2 | $6.94 | $7.44 |
| Box of 200 2" drywall screws | $6.47 | 1 | $6.47 | $6.94 |
| Pack of Hinges | $2.49 | 1 | $2.49 | $2.67 |
| 12" Sliders for Drawer | $4.99 | 1 | $4.99 | $5.35 |
| Latch for Control Panel | $0.68 | 4 | $2.72 | $2.92 |
| Buttons and Joysticks | $49.48 | 1 | $49.48 | $49.48 |
| 20' of 5/8" White T-Molding | $13.80 | 1 | $13.80 | $13.80 |
| Slot Cutter Router Bit | $16.00 | 1 | $16.00 | $16.00 |
| Sponge Brush | $0.68 | 1 | $0.68 | $0.73 |
| Behr Primer - 1 Gallon | $16.97 | 1 | $16.97 | $18.20 |
| Paint Roller Cover | $3.27 | 1 | $3.27 | $3.51 |
| Wood Filler | $1.97 | 1 | $1.97 | $2.11 |
| KeyWiz Keyboard Encoder | $41.45 | 1 | $41.45 | $41.45 |
| Coin Door | $44.98 | 1 | $44.98 | $44.98 |
| PC to TV Card | $6.04 | 1 | $6.04 | $6.04 |
| Side Art | $58.95 | 1 | $58.95 | $63.08 |
| Paint Brush | $11.97 | 1 | $11.97 | $12.84 |
| Bezel | $47.05 | 1 | $47.05 | $47.05 |
| Marquee | $12.50 | 1 | $12.50 | $12.50 |
| 5/8" Particle Board | $6.00 | 1 | $6.00 | $6.00 |
| VGA Cable for Monitor | $6.48 | 1 | $6.48 | $6.48 |
| Ctrl. Panel Overlay Printing | $33.25 | 1 | $33.25 | $33.25 |
| Wire and Connectors | $12.75 | 1 | $12.76 | $13.69 |
| Total: | $483.64 |
Saturday, February 02, 2008
Some Final Pics
Well, the Mario Bros. arcade has been done for QUITE some time now, but I never got around to taking any final pictures, until now. Hope you enjoy them!
 Here's the cabinet in it's corner of the house.
 An angled view.
 A front view.
 Another angled shot.
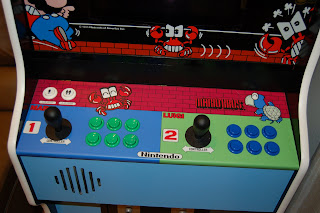 Here's the 6-button custom control panel.
 Original bezel and marquee.
 Reproduction side art.
 Original coin door.
 Another look at the control panel.
 Here's the machine turned on.
 Another shot with the 17" monitor.
 Here's the cabinet in it's corner of the house.
 An angled view.
 A front view.
 Another angled shot.
 Here's the 6-button custom control panel.
 Original bezel and marquee.
 Reproduction side art.
 Original coin door.
 Another look at the control panel.
 Here's the machine turned on.
 Another shot with the 17" monitor.
Monday, January 22, 2007


Tuesday, November 28, 2006
Donkey Kong 3 Update
I know it' been awhile, but I've finished my Mario cabinet and will be back soon with some pictures of the finished product. Meanwhile, my brother's DK3 cabinet is wrapping up nicely. This weekend he finished the control panel, applying the CPO, adding buttons, and attaching the hinged CP to the cabinet. Take a look!
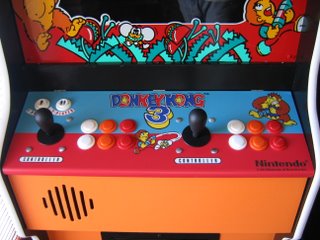 Here's the top-down view with the competition-style buttons.
The color scheme he chose works well I think.
 Here's an angled view showing the speaker grill panel.
Both pieces are hinged for access underneath.
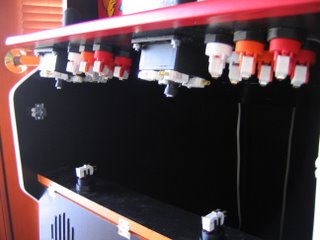 Here's what's under the hood. The next step will be wiring the buttons.
 And here's the whole cabinet. Isn't it a beauty?
 Here's the top-down view with the competition-style buttons.
The color scheme he chose works well I think.
 Here's an angled view showing the speaker grill panel.
Both pieces are hinged for access underneath.
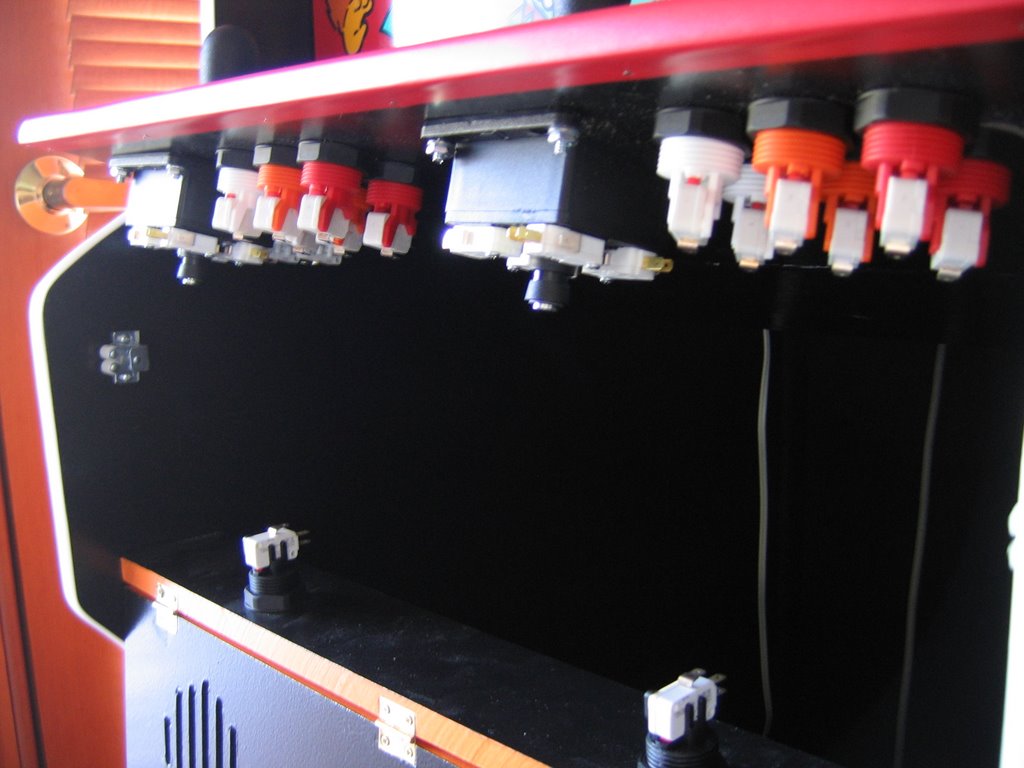 Here's what's under the hood. The next step will be wiring the buttons.
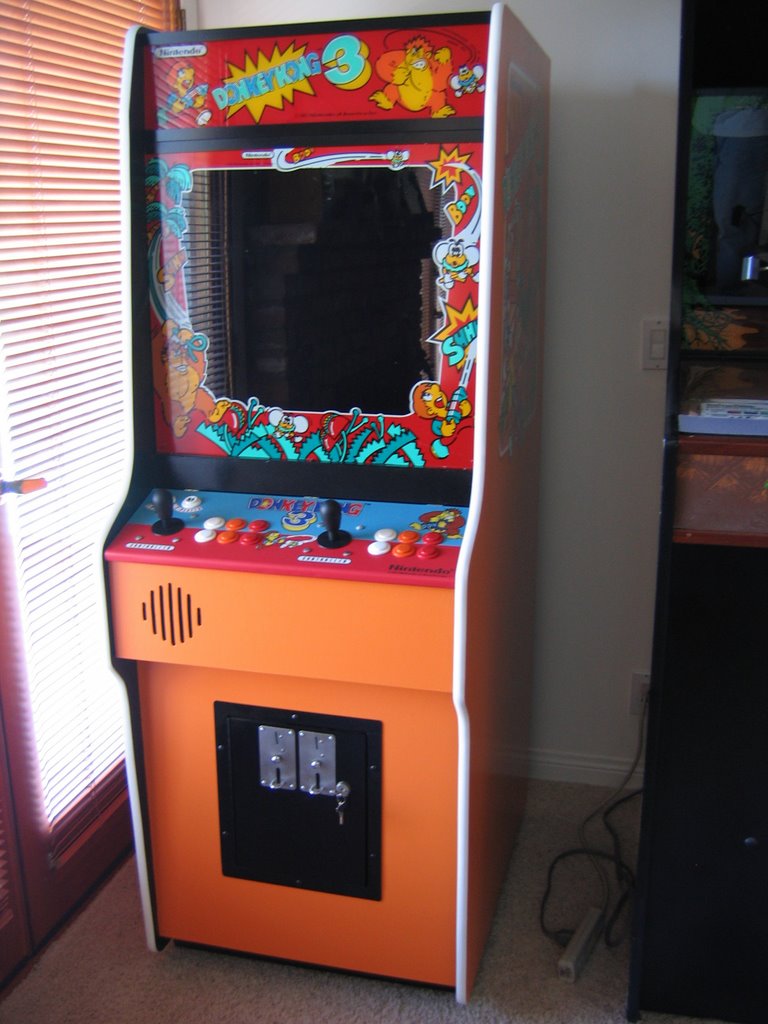 And here's the whole cabinet. Isn't it a beauty?
Wednesday, September 13, 2006
Fully Functional Arcade
While the project is not 100% complete, I was able to get it up and running by finishing the wiring and putting the computer together in the cabinet. Unfortunately my free 20" monitor has some problems (some loose connection makes the colors come in and out), so I am forced to get rid of it and use my 17" CRT for now. This will not be permanent, but it will suffice for now. The good news is that with the cabinet put together, the end is in sight. A solution for the speaker grill panel is the final step. Once this is done I'll post pictures of Mario's final home.
Tuesday, September 05, 2006
I'm Still Alive!
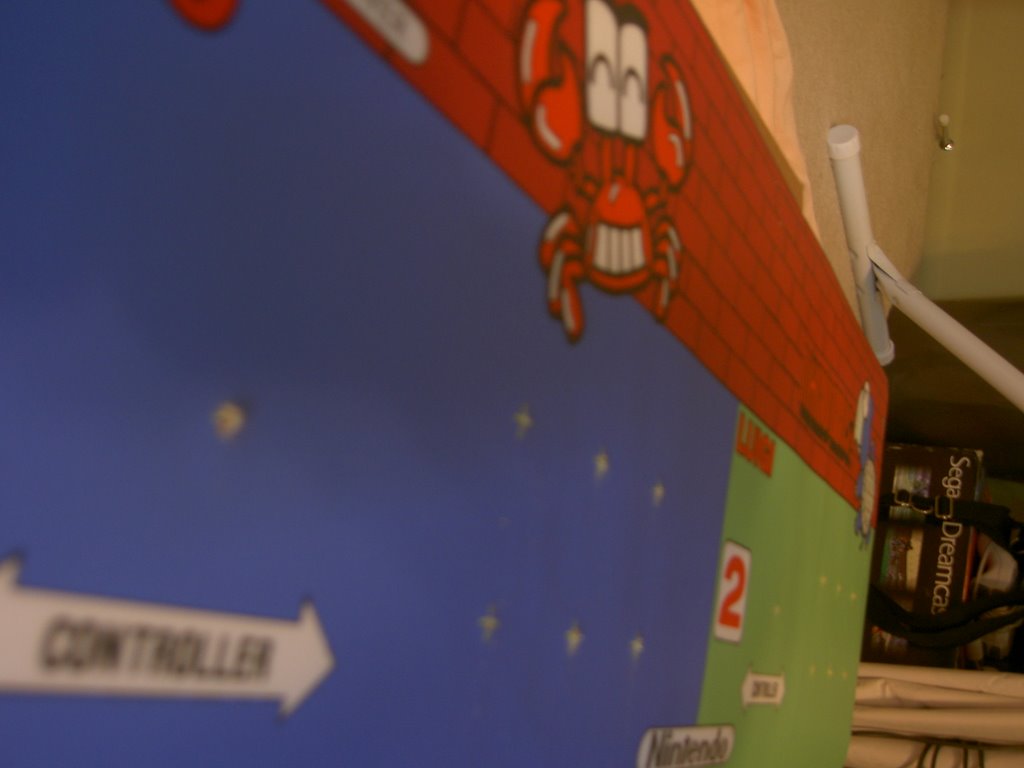
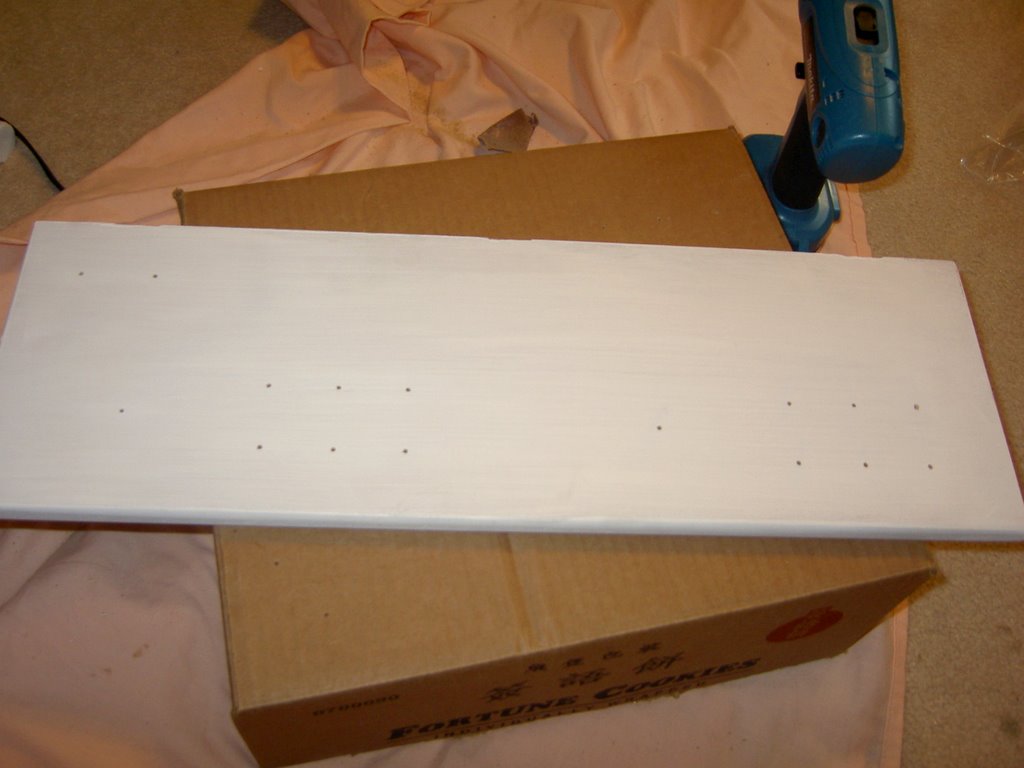
Sorry it's been so long since I've updated. Progress has been so slow that updates were almost not warranted. But I have done some work since last updating. The control panel is attached to the cabinet with buttons and joysticks installed. The CP is hinged and can be raised about 30 degrees for better access to wires. It doesn't go up as much as I'd like, but there would have to be a noticable gap between the CP and the cabinet had I wanted to make the wiring more accessible. I've wired most of the buttons up, and that's where I ran into a problem. I placed the buttons/joysticks too far 'down' on the CP so that with the switches and wires connected, the front speaker panel hits the wires. This is unfortunate because fixing the problem means either extensive Dremel-ing or redoing the CP. I don't want to redo the CP because of the cost of printing a new overlay, so I'm going to try to Dremel the speaker panel so that the wires no longer hit. Anyway here are some pictures of drilling the pilot holes in the CP. I lined up the artwork where I wanted it and drilled small holes where the crosshairs for each button and joystick hole were marked on the artwork. I was careful not to drill too quickly because that can tear the artwork. Later I drilled the real holes with a 1 1/8" bore drill bit. Then I attached the sticky CP overlay to the wood (again careful to line it up). Finally I cut the excess from the overlay that was over the newly drilled holes.



Wednesday, June 07, 2006
Donkey Kong 3 Update
My brother has made significant progress on his cabinet, so I thought it deserved a pictorial update. His next step will be installing the keyboard tray and applying the side art.
 This is taken from the inside of the cabinet. He used small L-brackets like this to secure the bezel from the inside (3 of them, one in the center at the top as shown, and 1 on either side near the top). This differed from my approach as I used thin pieces of wood painted black along the sides. Either way works fine, I just think my way eliminated the gap between the bezel and the cabinet so no light would shine through.
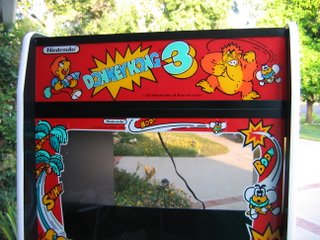 Here's the marquee installed. Great artwork on this cabinet.
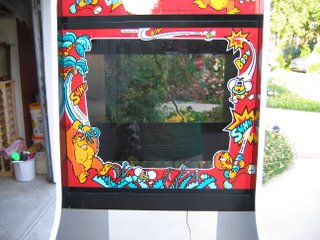 Here's the bezel installed.
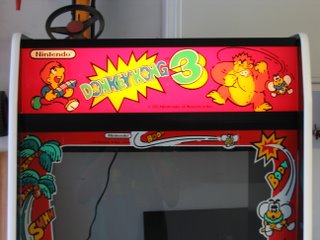 Here's the marquee with the light on.
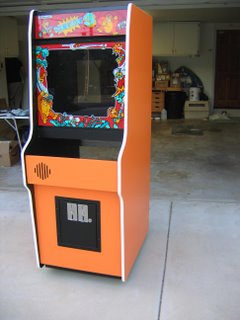 And finally, the whole cabinet. Coming along!
 This is taken from the inside of the cabinet. He used small L-brackets like this to secure the bezel from the inside (3 of them, one in the center at the top as shown, and 1 on either side near the top). This differed from my approach as I used thin pieces of wood painted black along the sides. Either way works fine, I just think my way eliminated the gap between the bezel and the cabinet so no light would shine through.
 Here's the marquee installed. Great artwork on this cabinet.
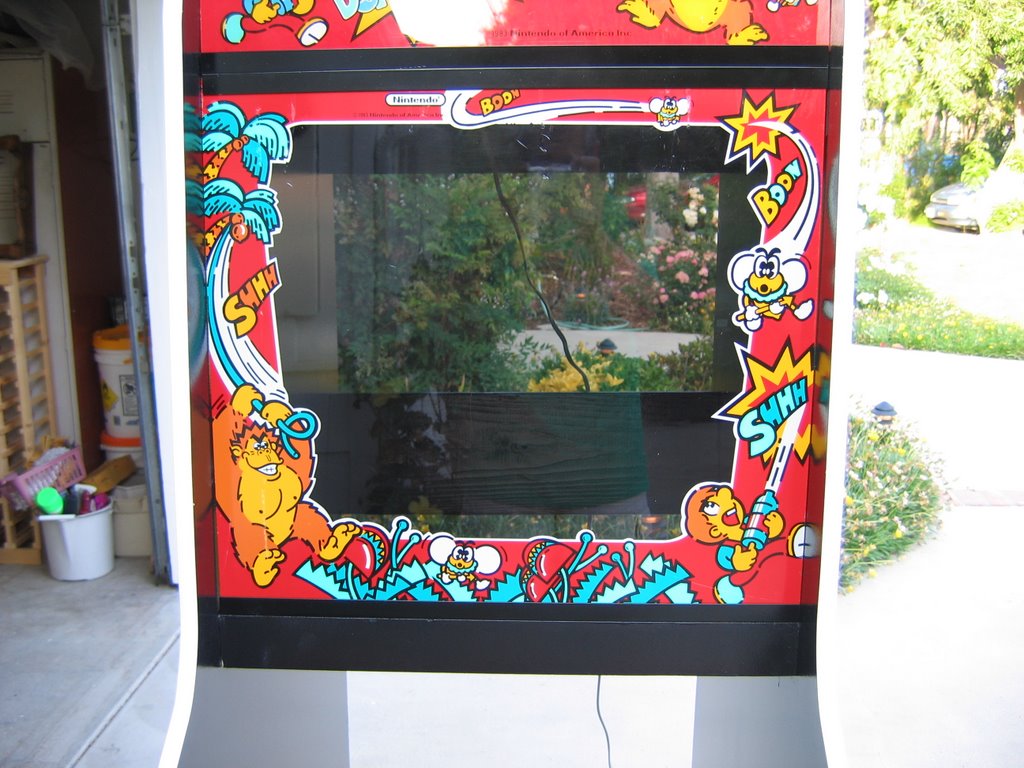 Here's the bezel installed.
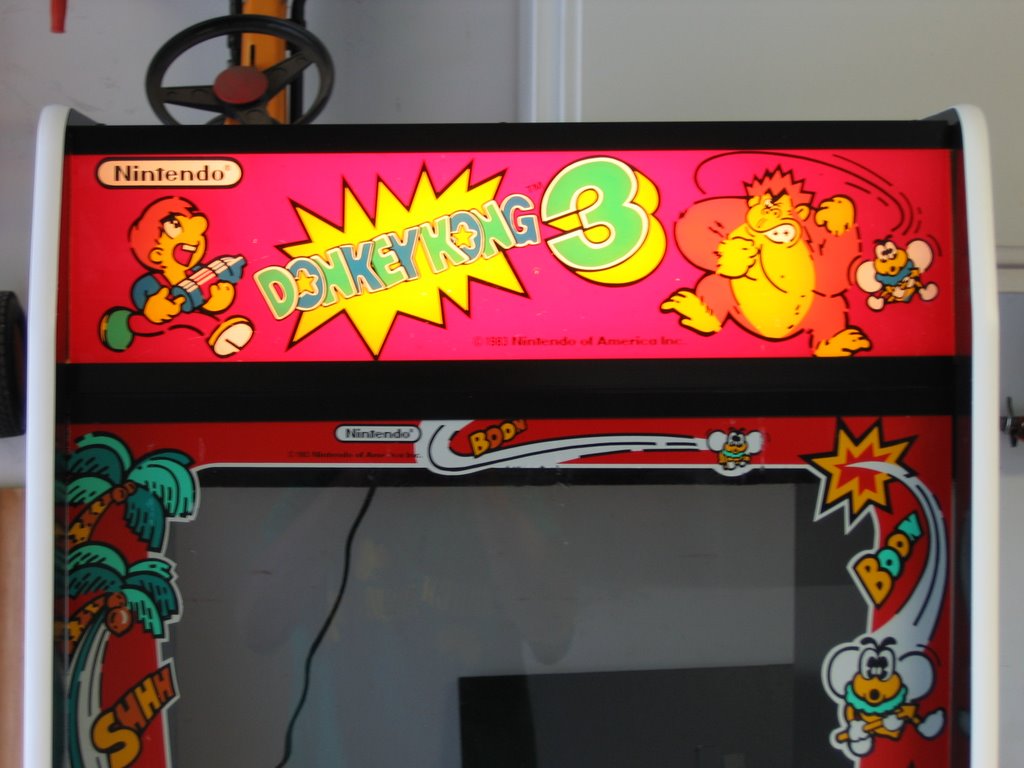 Here's the marquee with the light on.
 And finally, the whole cabinet. Coming along!
Monday, May 22, 2006
Cabinet Complete (Kinda, Sorta...)
The cabinet is now officially, kind of complete...sort of. All major, heavy work requiring more than a drill has been completed, all artwork (except the control panel overlay) has been applied/installed, and all painting is done. The cabinet has been transported to my condo and awaits the CPO for the final touch. Here's what we accomplished this weekend:
 To apply the side art, first we laid it carefully on its side.
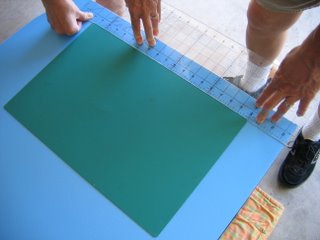 According to the installation manual provided by Nintendo (can be found at www.klov.com), Mario Bros. side art is to be applied 2" from the top and 2" from the back of the cabinet. So, we made the measurement, placed something next to the ruler to hold its place...
 And then used the half-sticky butcher's paper that painters use (I don't know what it's called) to give us a guide for where to place the side art.
 Then, with mom and pop holding the bottom up high, I lined up one corner and slowly went across the width of the artwork with a cloth, making sure there were no bubbles. Just make sure it's lined up right before you start, because there's no turning back once it's down.
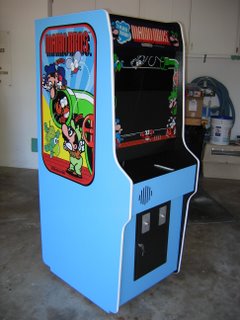 Let me tell you, the cabinet looks awesome...
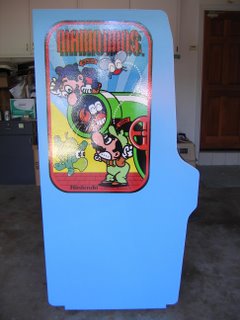 A shot from the side...
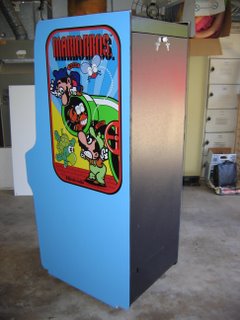 Here's the back with the door in
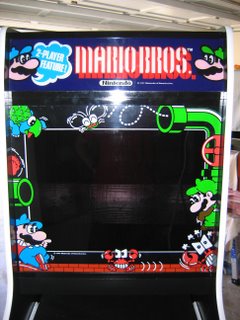 Here's the bezel and marquee secured
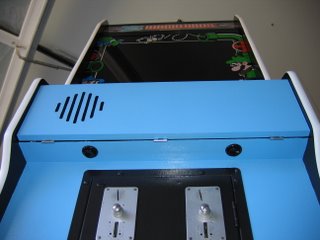 A shot from underneath with the hidden freeplay buttons
- Attached thin pieces of black painted wood along the inside of the cabinet where the bezel and marquee rest to block light and secure the plexi.
- Attached top bracket to secure marquee.
- Did some touch-up painting on parts we nicked and scratched.
- Drilled hole for lock in back door and installed lock.
- Applied side art.
- Transported to my home.
 To apply the side art, first we laid it carefully on its side.
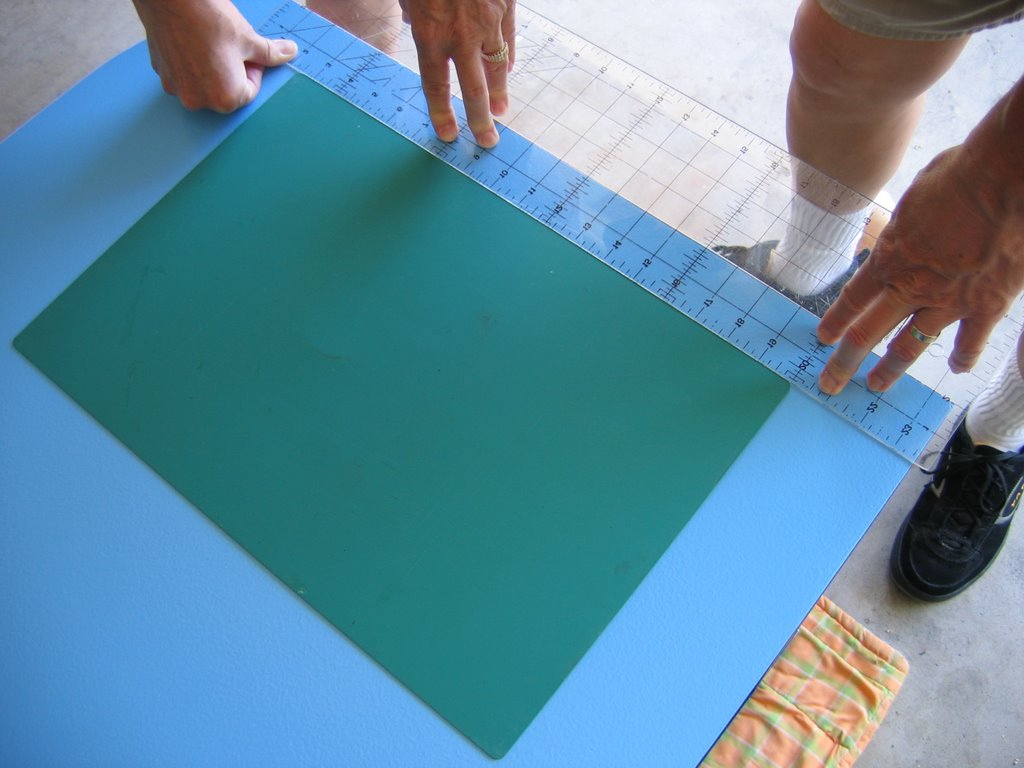 According to the installation manual provided by Nintendo (can be found at www.klov.com), Mario Bros. side art is to be applied 2" from the top and 2" from the back of the cabinet. So, we made the measurement, placed something next to the ruler to hold its place...
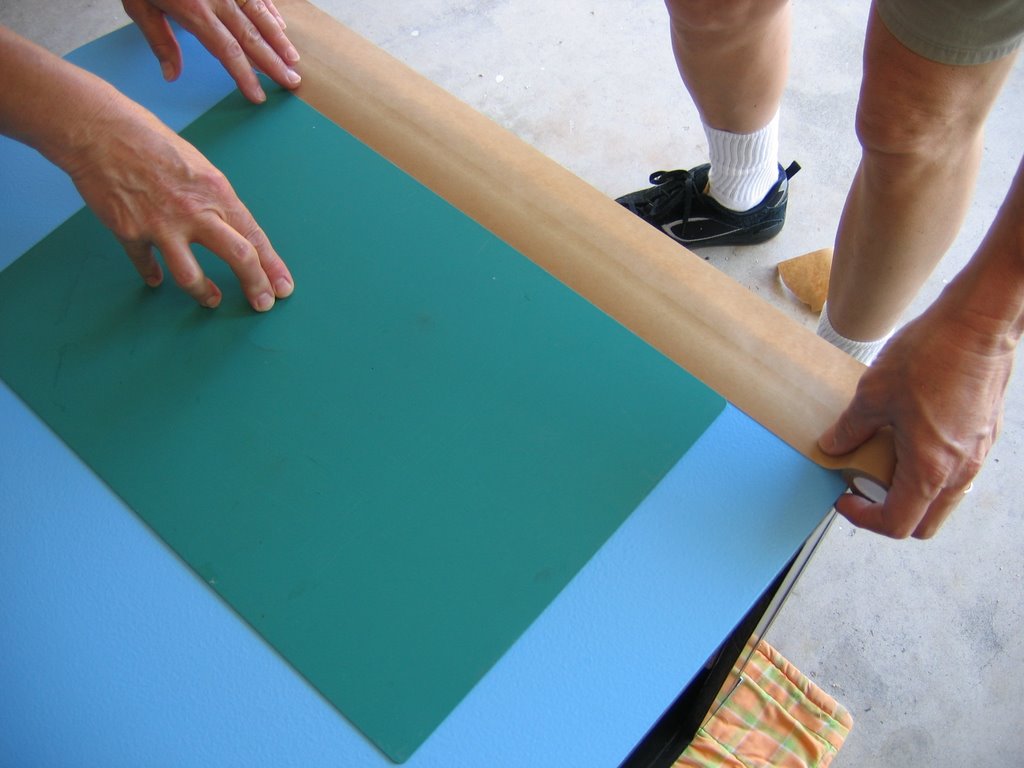 And then used the half-sticky butcher's paper that painters use (I don't know what it's called) to give us a guide for where to place the side art.
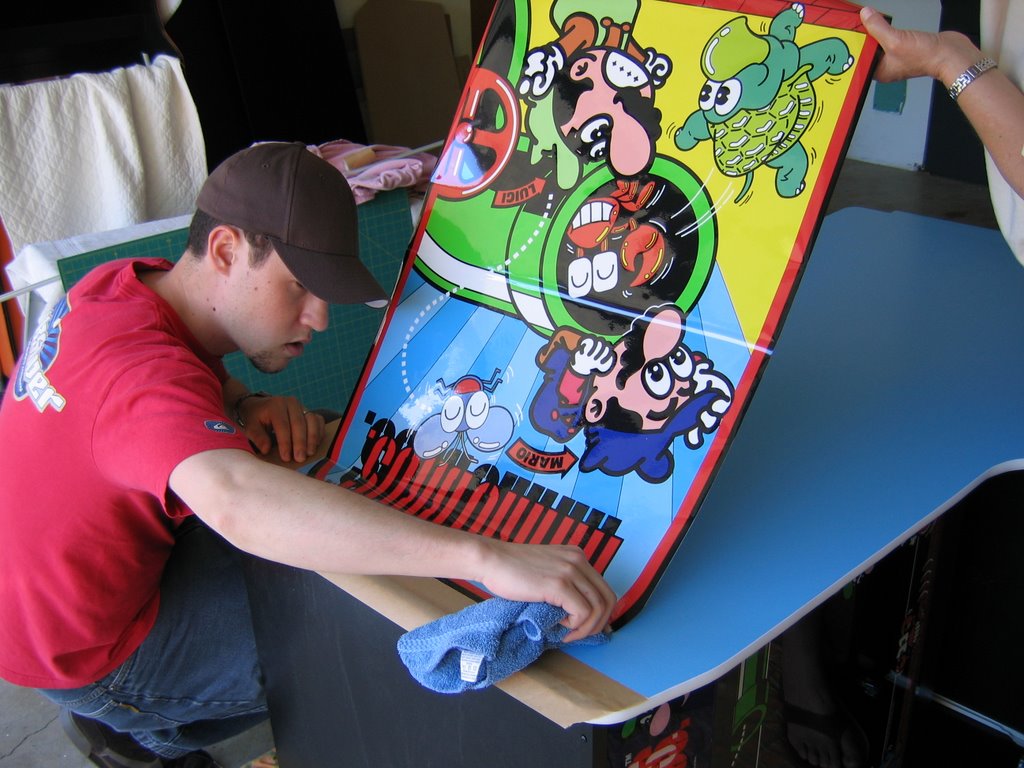 Then, with mom and pop holding the bottom up high, I lined up one corner and slowly went across the width of the artwork with a cloth, making sure there were no bubbles. Just make sure it's lined up right before you start, because there's no turning back once it's down.
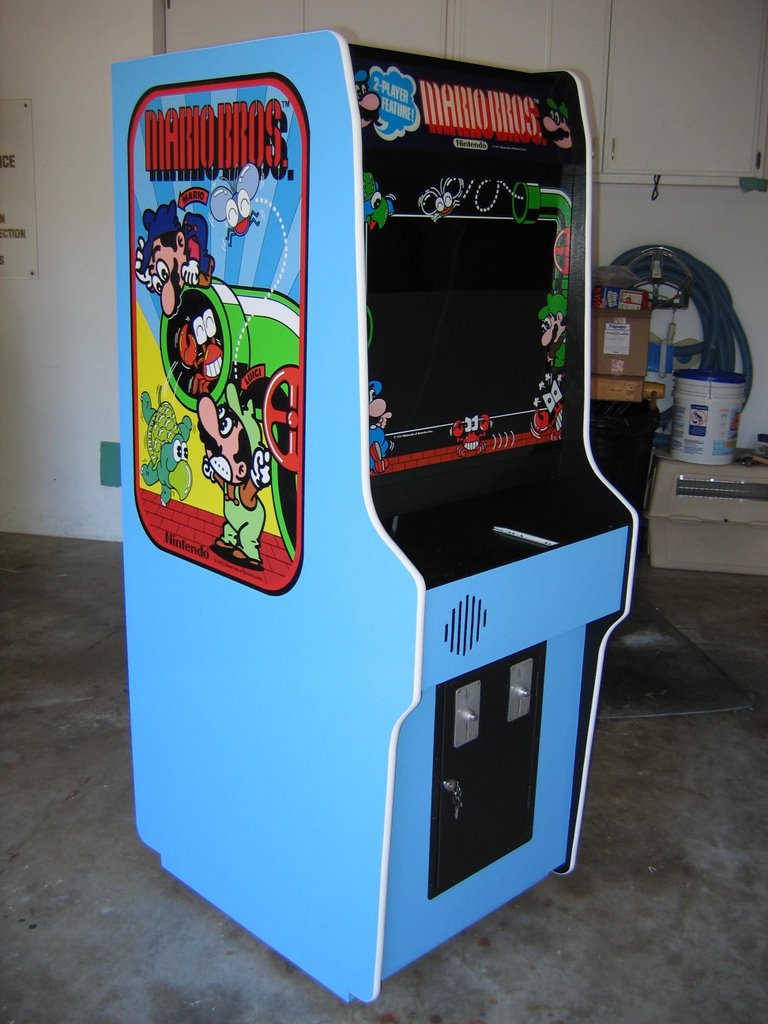 Let me tell you, the cabinet looks awesome...
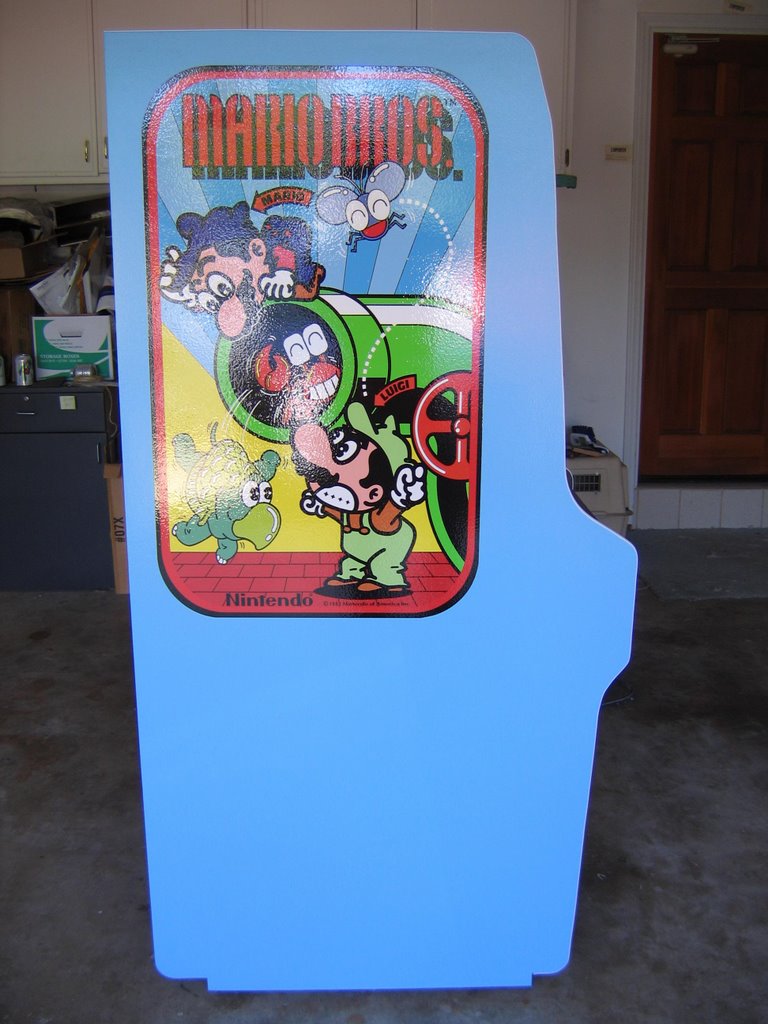 A shot from the side...
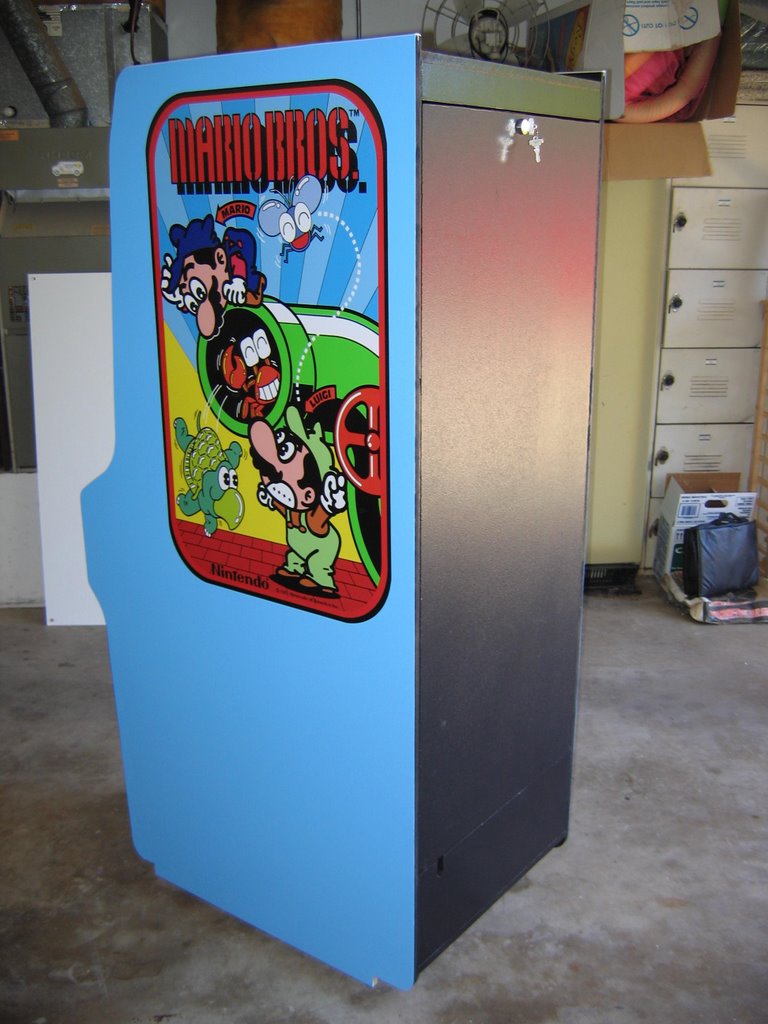 Here's the back with the door in
 Here's the bezel and marquee secured
 A shot from underneath with the hidden freeplay buttons
Sunday, April 30, 2006
Some Nice Touches
With the painting wrapped up, I was able to progress with a few smaller, but important steps. First, I installed the coin door by drilling the necessary holes with the door in place and then securing it with 11 bolts painted black. Simple. Then, I reattached the keyboard tray and speaker grill panel. Also simple. Next, I mounted the marquee light upright using some leftover 'L'-brackets in the front and back. Then, I attached 3 of the 4 'L'-brackets (painted black) that will be used to secure the marquee and the bezel. The brackets that secure the bottom of the marquee and the top of the bezel, I mounted together to the marquee rest, forming a 'T'. I also mounted the bracket for the bottom of the bezel to the bezel rest. The reason I didn't mount the top bracket was because the marquee doesn't quite extend left to right and some light shines through, so I want to mount some black pieces of wood on the sides to clear that issue up. I will do something similar with the bezel, but that will be more for actually securing the bezel than for any light issue. The marquee rest is angled, so the marquee itself fits nicely between that and the bracket.
The last bit was putting on the t-molding which looks soooooo nice. This wasn't too difficult either. I just used a rubber mallet to tap it in with a piece of foam padding in between so I didn't scuff up the t-molding. I had a helper keep the t-molding straight because it tends to twist on its own and doesn't like to go in as nicely. Anyway, here are the pictures!
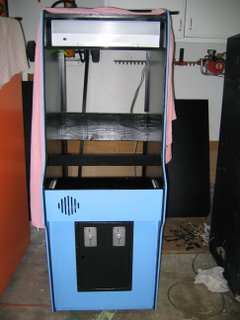 Here we've got the coin door installed as well as the speaker grill and keyboard tray mounted.
 A close-up of the coin door. This is an original Nintendo coin door off a Donkey Kong machine.
 The speaker grill is hinged to allow access to the keyboard tray. This gives easy access to PC functions.
 Here we see the marquee light mounted.
 Another angle of the light. There is another bracket in the back holding it in place.
 Here is my brother's coin door. It looks much nicer than mine, although it is not a Nintendo coin door. It is from the same era as the coin mechs are quite similar. The only big difference is the size of the door and that it opens from the right side.
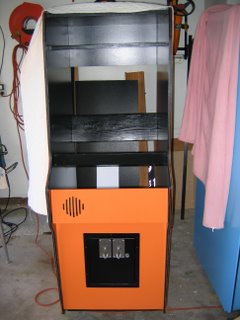 Full body shot of my brother's cabinet.
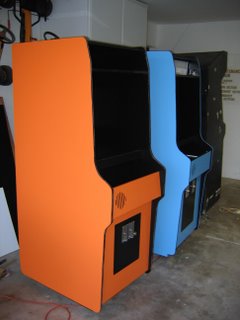 The two of them together. His speaker grill doesn't have the latches on yet (that's why it looks sunken in). Also from this angle you might notice that the front bottom corner of the blue cab is different than the orange cab. My brother's is actually more accurate. I accidentally incorporated the bottom 'box' as part of the sides of the cabinet (it is actually supposed to be set in a little).
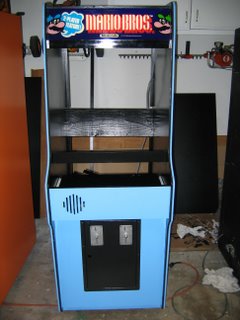 Here the black brackets are installed allowing the marquee to be placed.
 With the lights out and the marquee light on.
 A clearer shot of the marquee light.
 A close-up of the black metal brackets.
 T-molding installed.
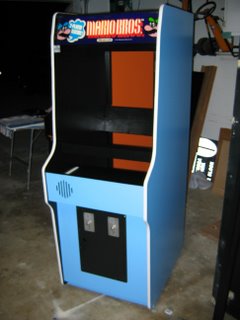 Another t-molding angle.
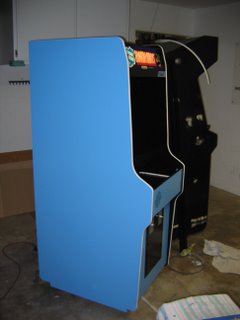 T-molding from the side.
 Here's the bezel held in place just for fun.
 And from an angle.
The last bit was putting on the t-molding which looks soooooo nice. This wasn't too difficult either. I just used a rubber mallet to tap it in with a piece of foam padding in between so I didn't scuff up the t-molding. I had a helper keep the t-molding straight because it tends to twist on its own and doesn't like to go in as nicely. Anyway, here are the pictures!
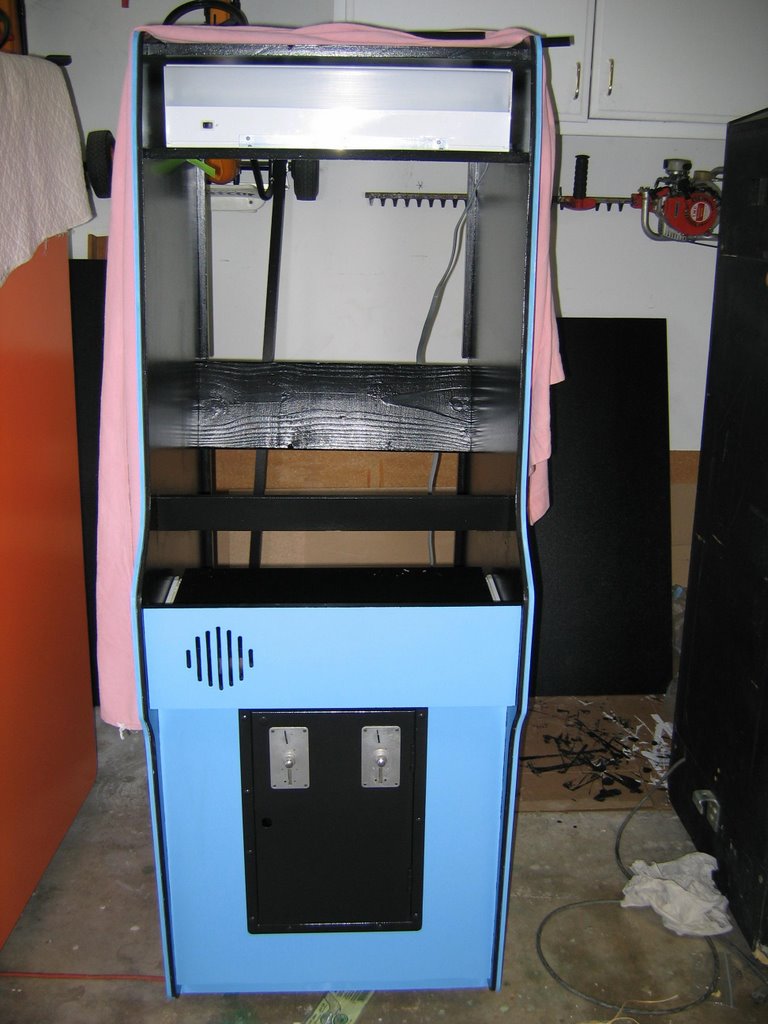 Here we've got the coin door installed as well as the speaker grill and keyboard tray mounted.
 A close-up of the coin door. This is an original Nintendo coin door off a Donkey Kong machine.
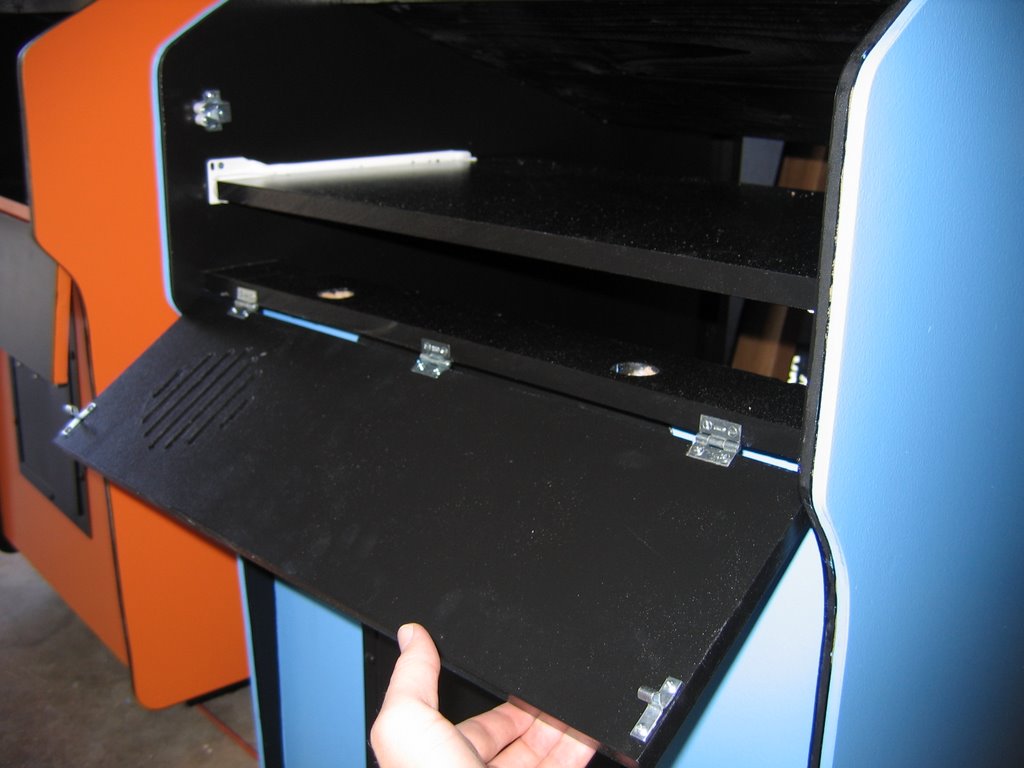 The speaker grill is hinged to allow access to the keyboard tray. This gives easy access to PC functions.
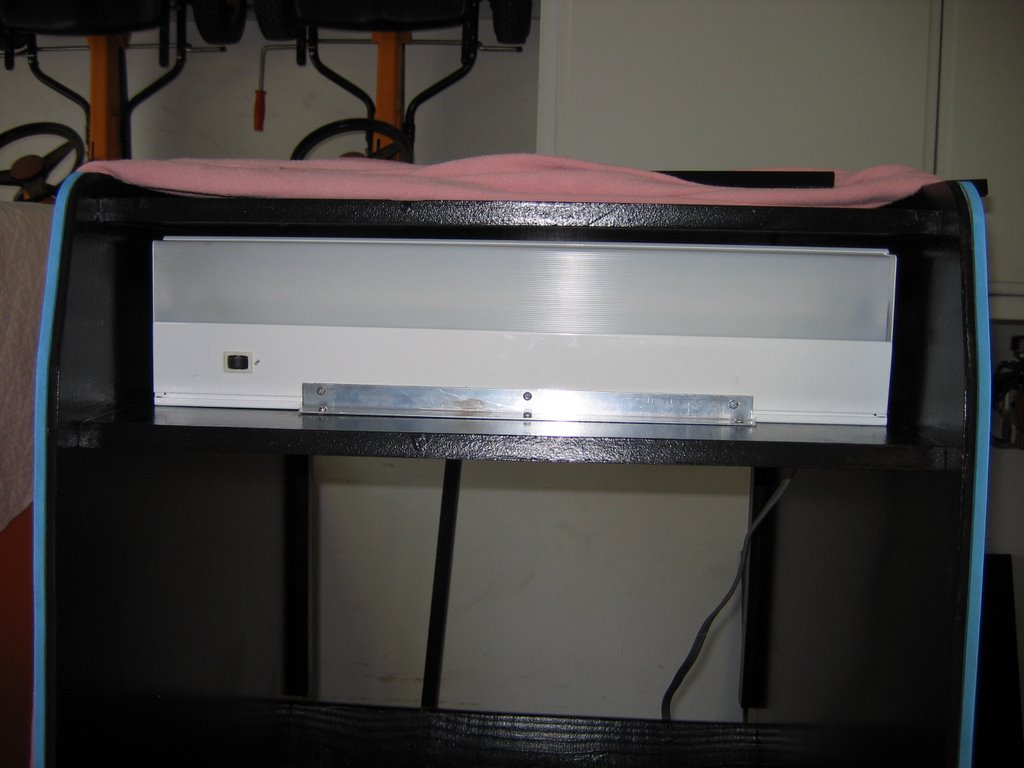 Here we see the marquee light mounted.
 Another angle of the light. There is another bracket in the back holding it in place.
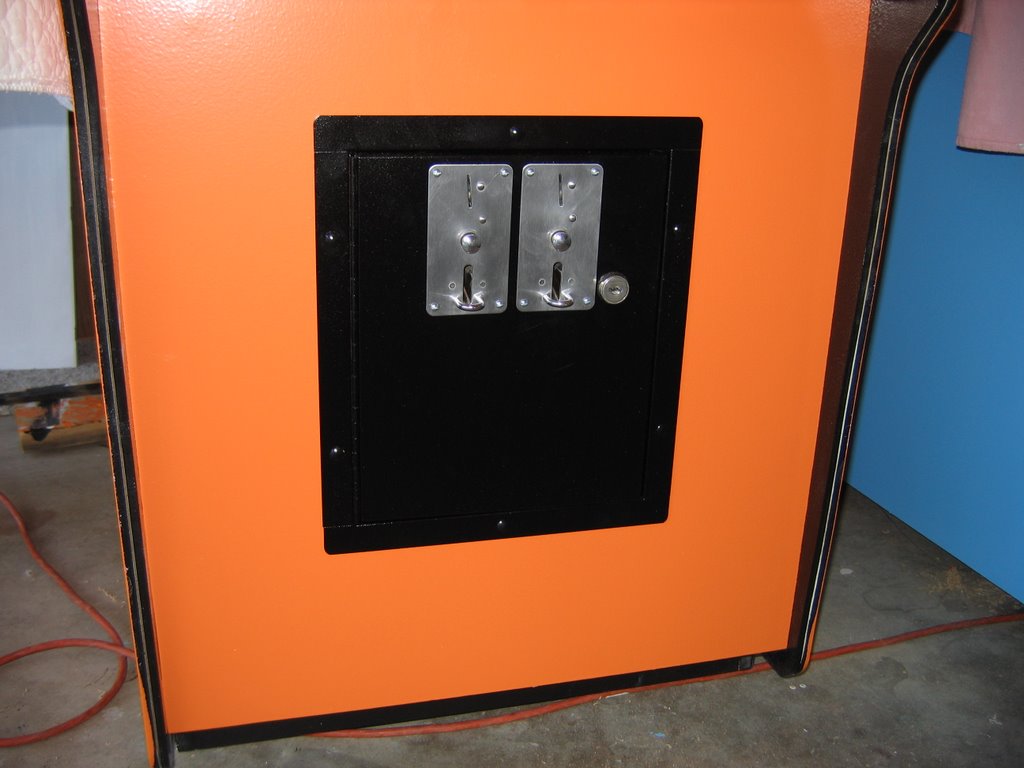 Here is my brother's coin door. It looks much nicer than mine, although it is not a Nintendo coin door. It is from the same era as the coin mechs are quite similar. The only big difference is the size of the door and that it opens from the right side.
 Full body shot of my brother's cabinet.
 The two of them together. His speaker grill doesn't have the latches on yet (that's why it looks sunken in). Also from this angle you might notice that the front bottom corner of the blue cab is different than the orange cab. My brother's is actually more accurate. I accidentally incorporated the bottom 'box' as part of the sides of the cabinet (it is actually supposed to be set in a little).
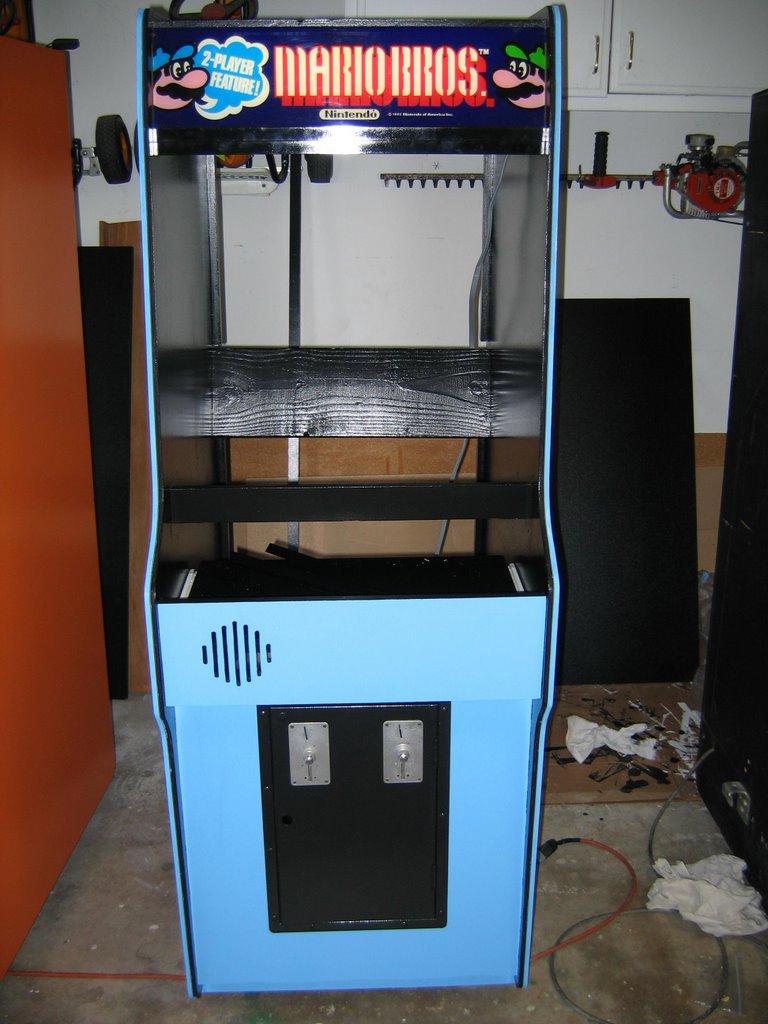 Here the black brackets are installed allowing the marquee to be placed.
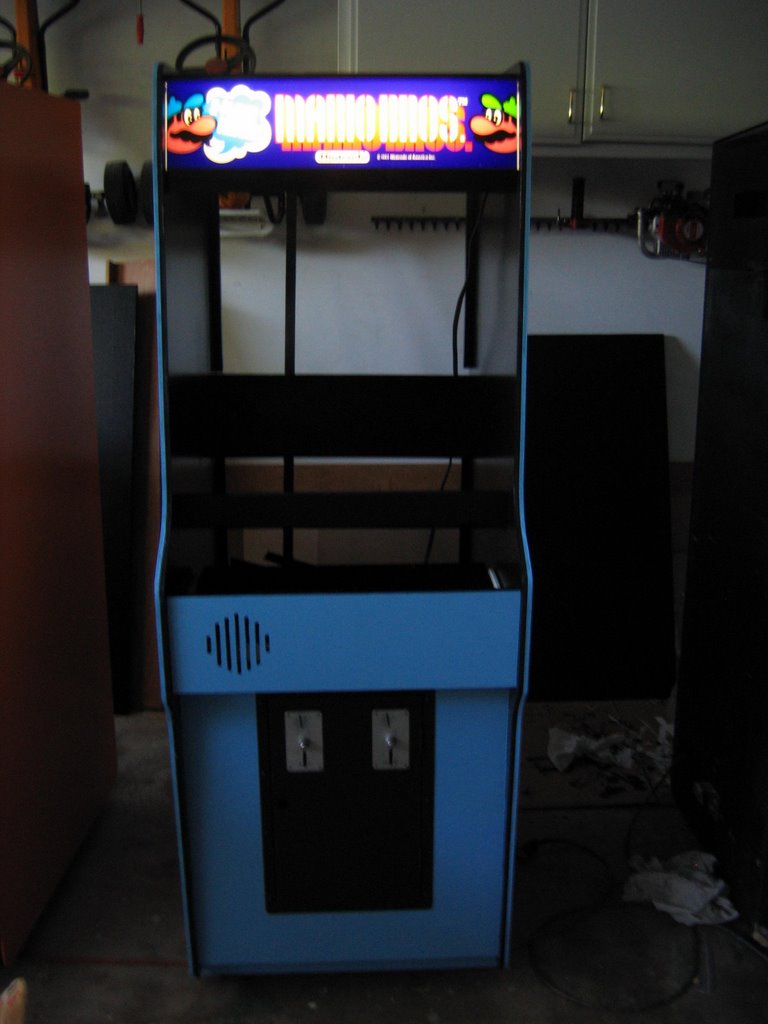 With the lights out and the marquee light on.
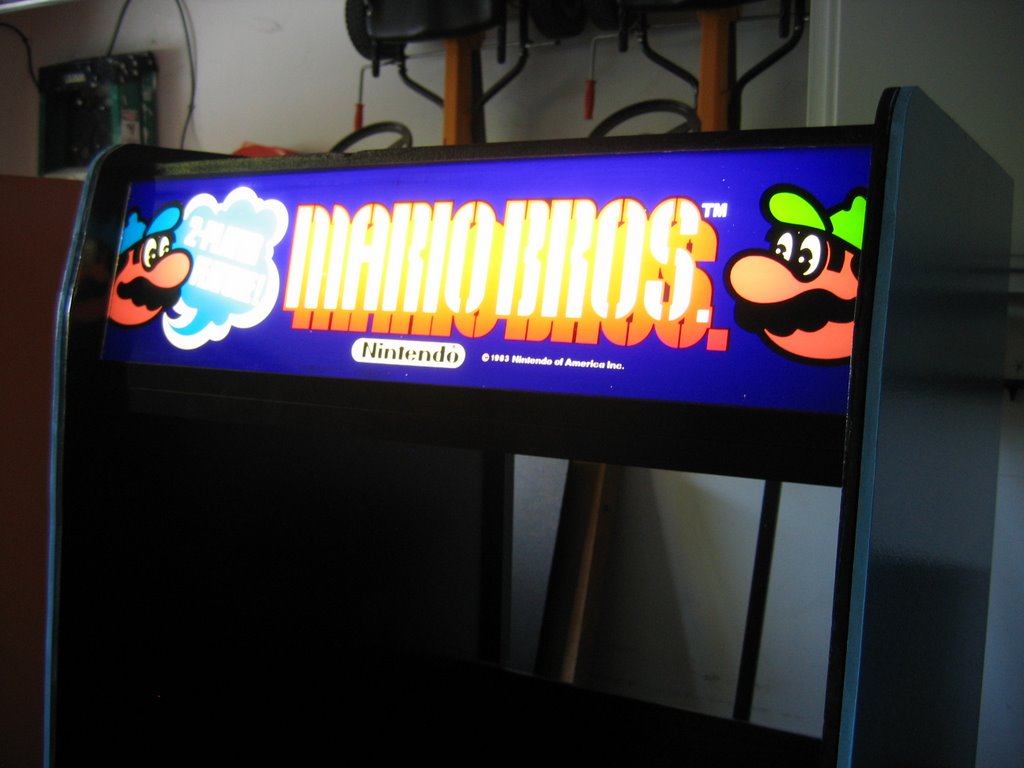 A clearer shot of the marquee light.
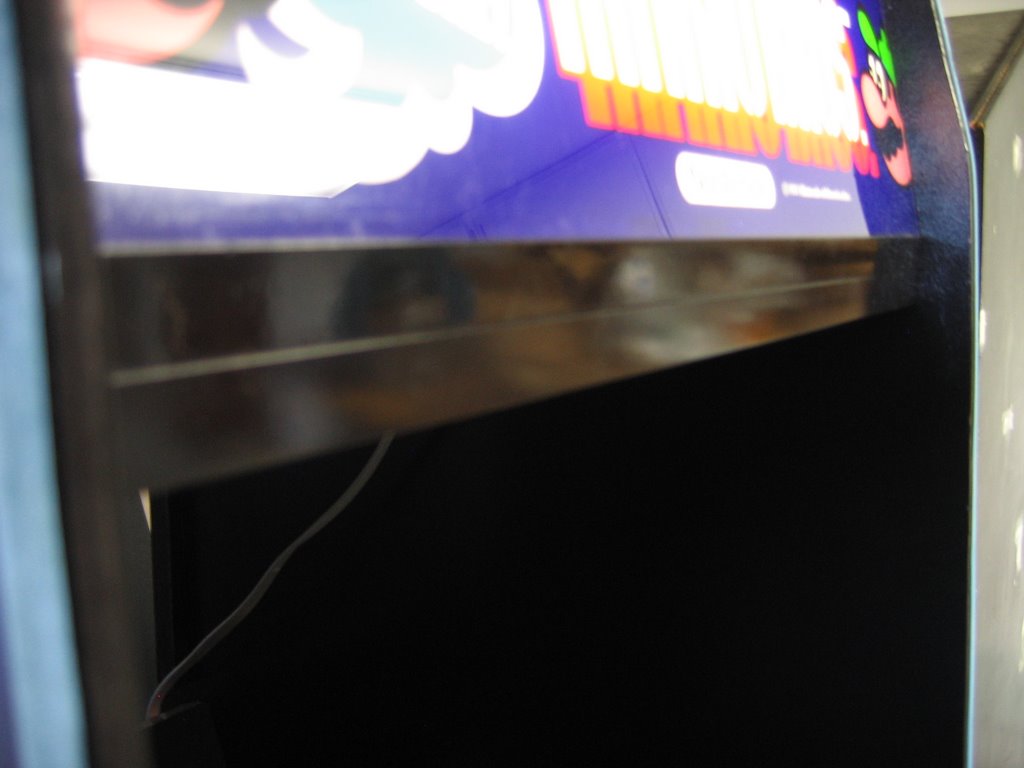 A close-up of the black metal brackets.
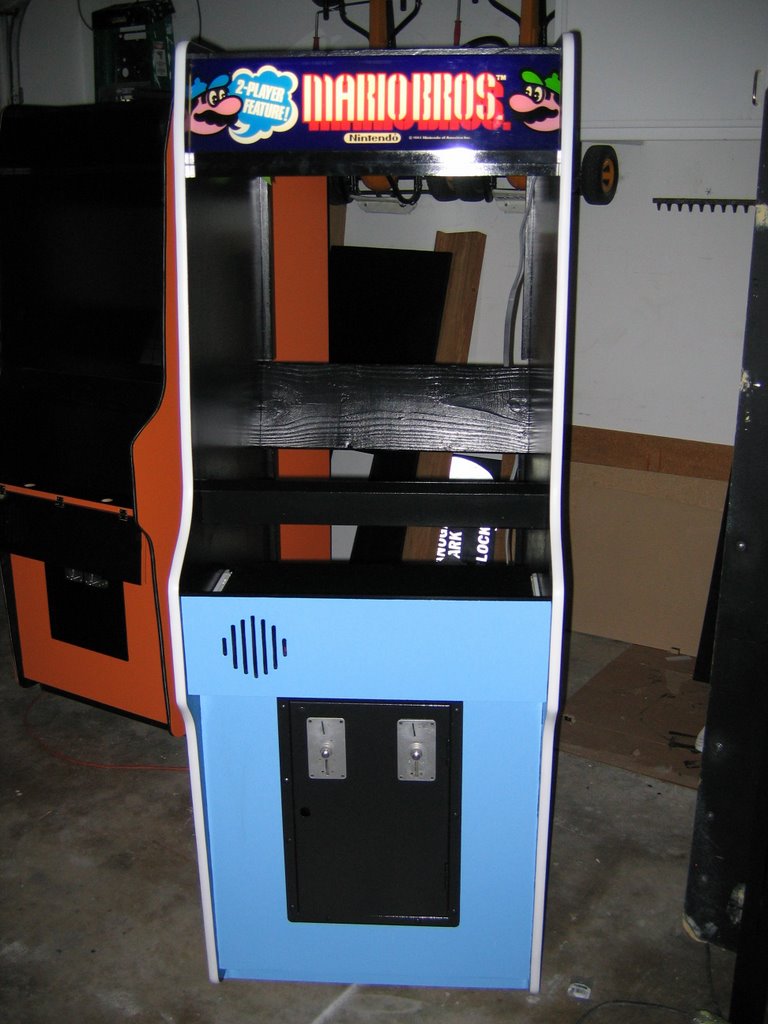 T-molding installed.
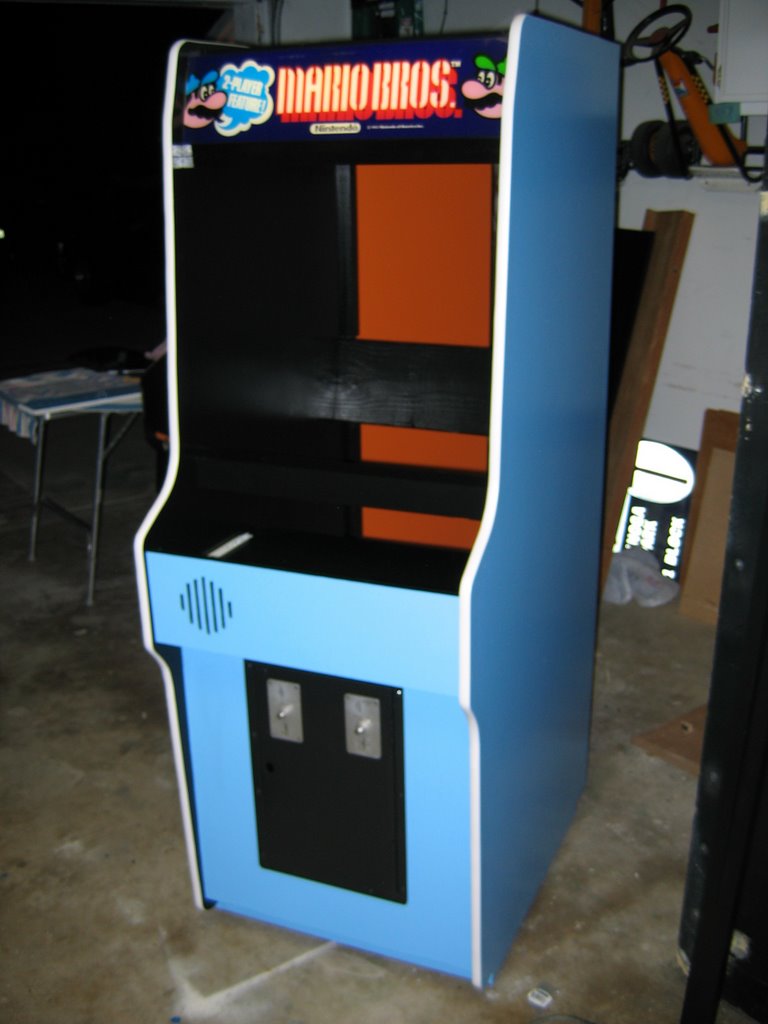 Another t-molding angle.
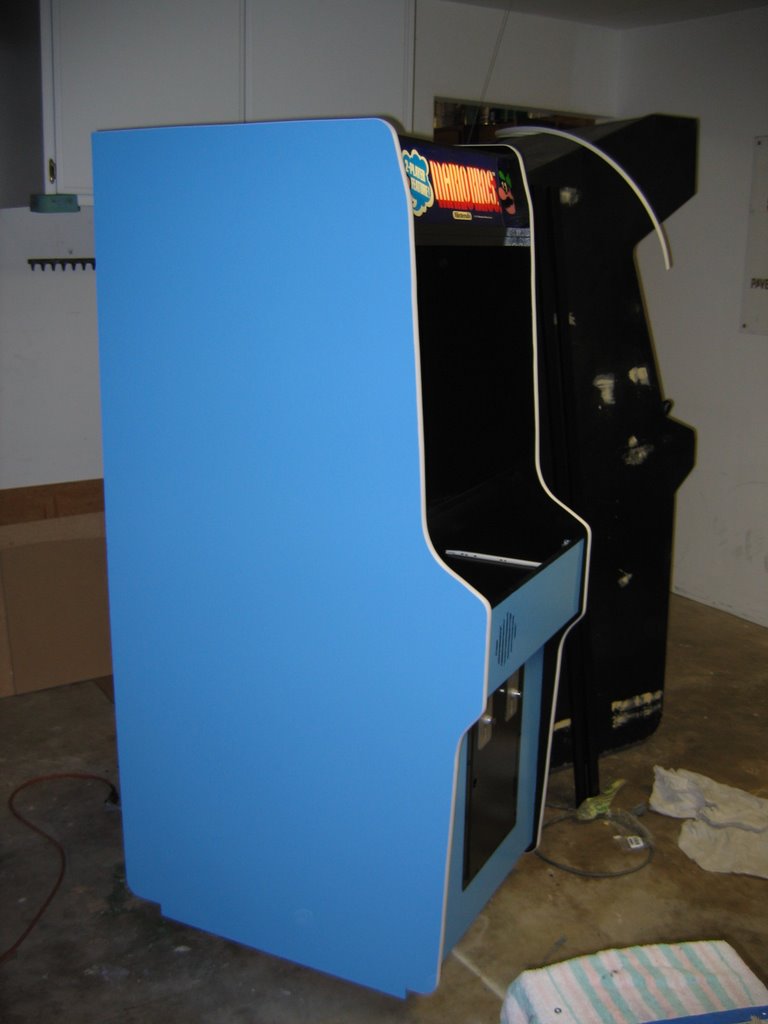 T-molding from the side.
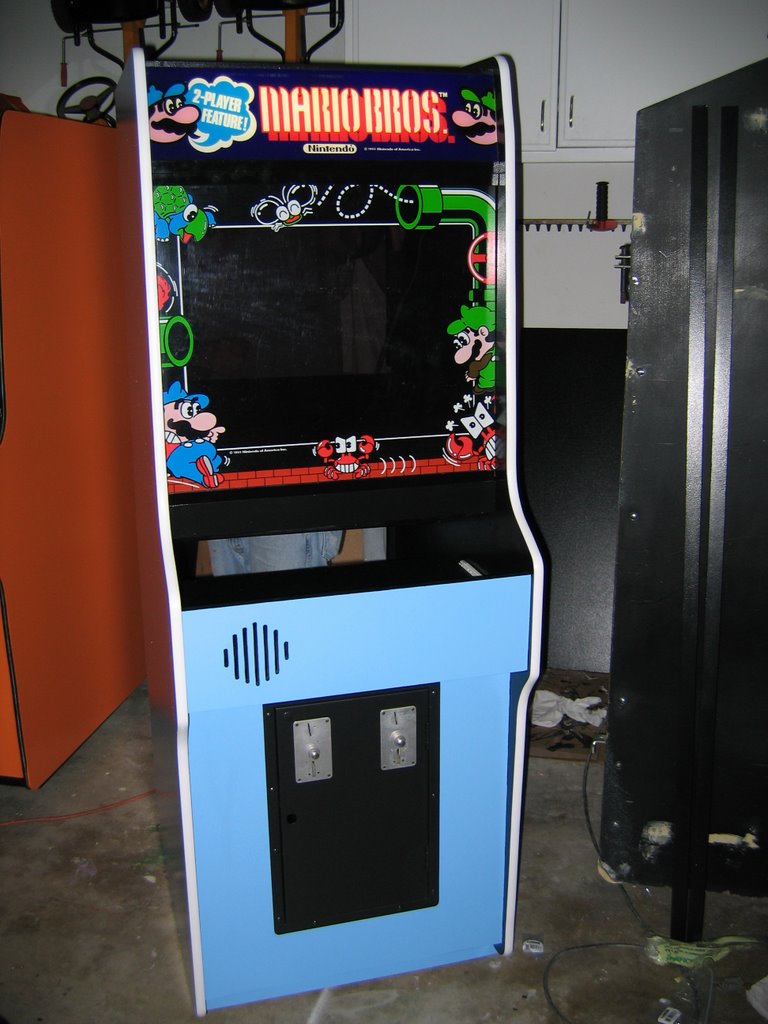 Here's the bezel held in place just for fun.
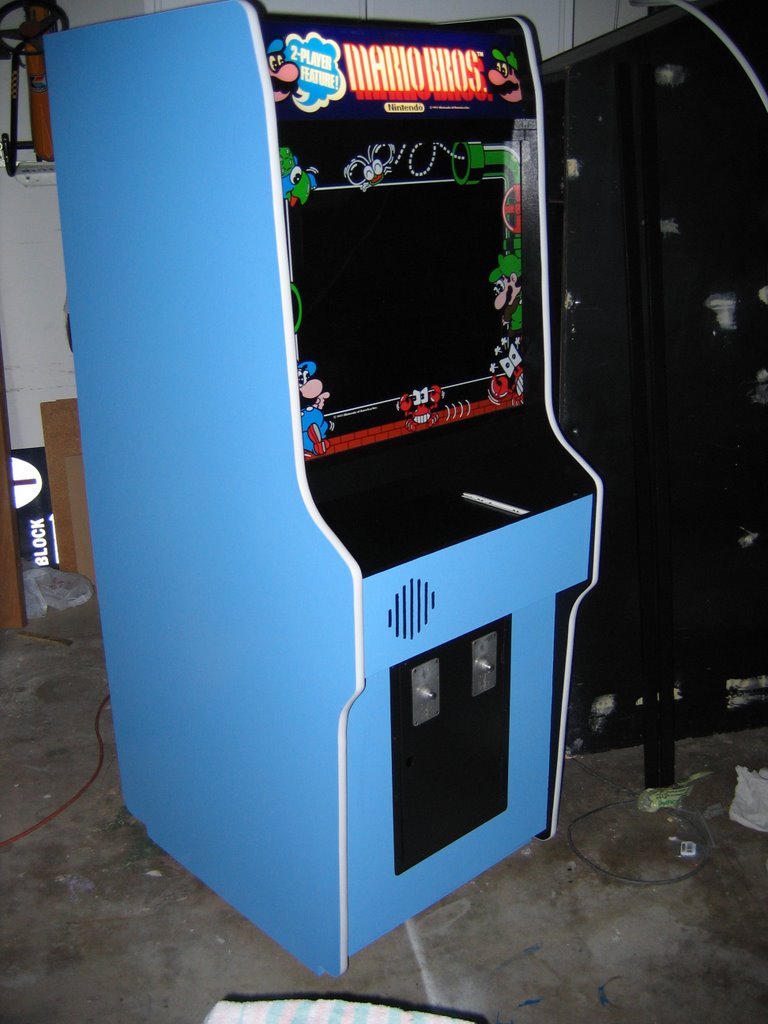 And from an angle.
Subscribe to:
Posts (Atom)