 Here's the top-down view with the competition-style buttons.
The color scheme he chose works well I think.
This site will follow the creation of my MAME arcade cabinet. I want to give it the classic look of a Mario Bros game from 1983. Check back often for updates on my progress.
 Here's the top-down view with the competition-style buttons.


 This is taken from the inside of the cabinet. He used small L-brackets like this to secure the bezel from the inside (3 of them, one in the center at the top as shown, and 1 on either side near the top). This differed from my approach as I used thin pieces of wood painted black along the sides. Either way works fine, I just think my way eliminated the gap between the bezel and the cabinet so no light would shine through.
 Here's the marquee installed. Great artwork on this cabinet.
 Here's the bezel installed.
 Here's the marquee with the light on.
 And finally, the whole cabinet. Coming along!
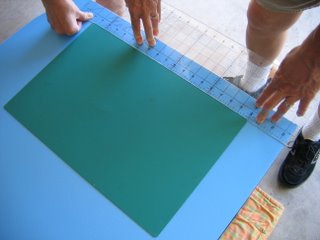
 According to the installation manual provided by Nintendo (can be found at www.klov.com), Mario Bros. side art is to be applied 2" from the top and 2" from the back of the cabinet. So, we made the measurement, placed something next to the ruler to hold its place...
 And then used the half-sticky butcher's paper that painters use (I don't know what it's called) to give us a guide for where to place the side art.
 Then, with mom and pop holding the bottom up high, I lined up one corner and slowly went across the width of the artwork with a cloth, making sure there were no bubbles. Just make sure it's lined up right before you start, because there's no turning back once it's down.
 The speaker grill is hinged to allow access to the keyboard tray. This gives easy access to PC functions.
 Here is my brother's coin door. It looks much nicer than mine, although it is not a Nintendo coin door. It is from the same era as the coin mechs are quite similar. The only big difference is the size of the door and that it opens from the right side.
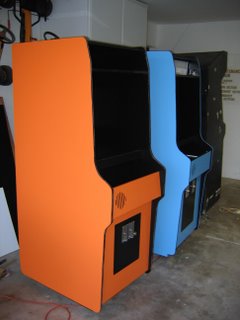
 The two of them together. His speaker grill doesn't have the latches on yet (that's why it looks sunken in). Also from this angle you might notice that the front bottom corner of the blue cab is different than the orange cab. My brother's is actually more accurate. I accidentally incorporated the bottom 'box' as part of the sides of the cabinet (it is actually supposed to be set in a little).


